In this blog, we plan to share a step-by-step instruction that will help you connect your HubSpot account to Prelo.
If you are new to Prelo, it’s worth knowing that Prelo is a client discovery tool that makes is shockingly easy for you to find decision makers from recently funded Startups.
Our ideal customers are SaaS Founders, Solopreneurs, Business Development Executives and Freelancers.
At the end of this short article, you will have all the information you need to connect your HubSpot account to Prelo.
So let’s get straight into it!
1 Getting Ready To Connect Prelo to HubSpot
1.1 Check that you are on a Paid Plan
Exports from Prelo to a HubSpot CRM can only be carried out by customers with paid plans.
Before you connect your account to Prelo, check that you have purchased a Paid Prelo Plan.
Follow the 5 steps below to find out if you’ve are on a paid plan?
- Click your profile name on the top right hand corner of the screen
- Select Pricing Plans from the list (see image 1.0)
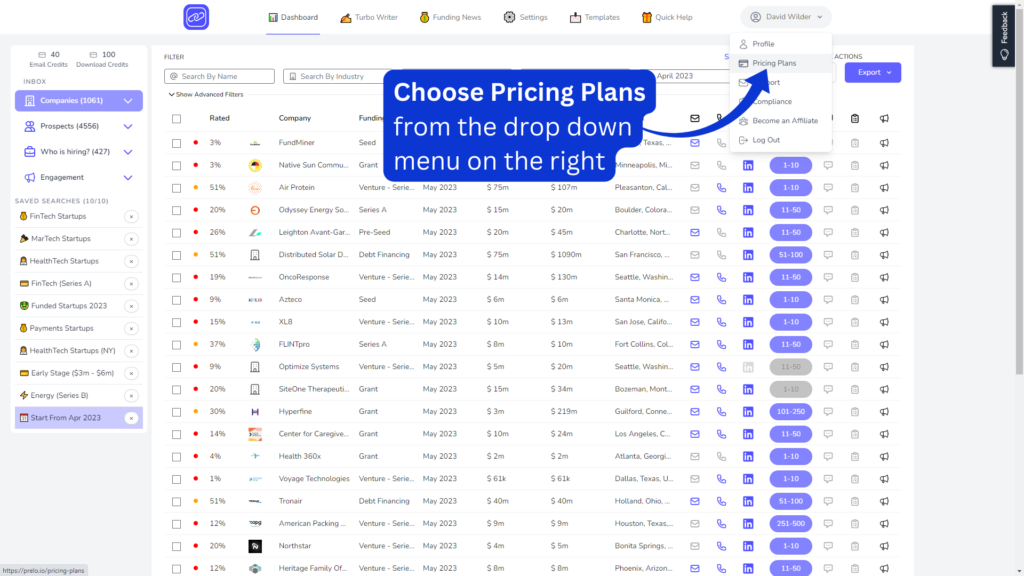
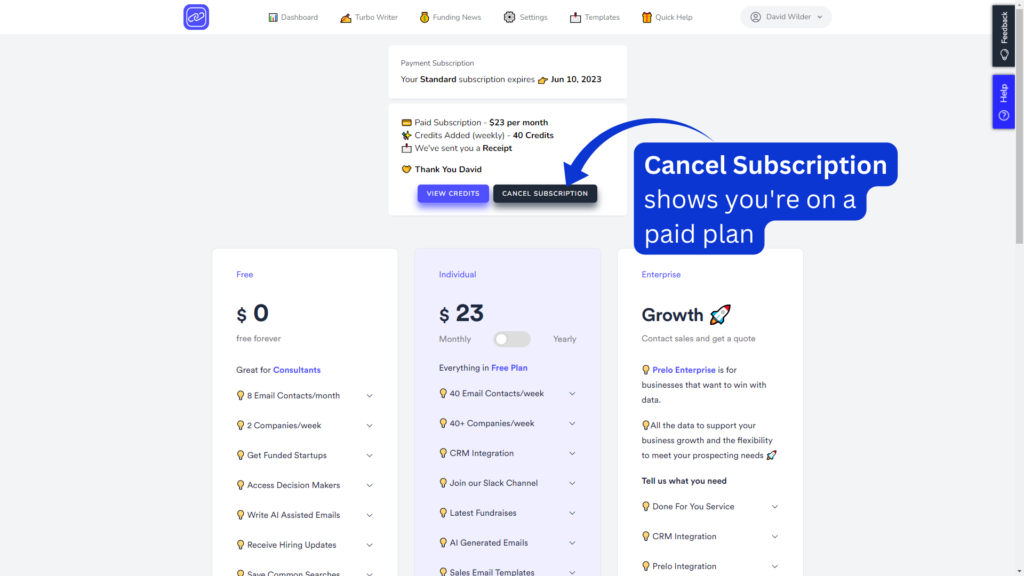
1.0 Getting to the Pricing Plan’s Page from the Dashboard - Go into the Pricing Plans Page
- Look for Cancel Subscription Button(see image 1.1)
- The presence of the Cancel Subscription Button proves you are a paid customer
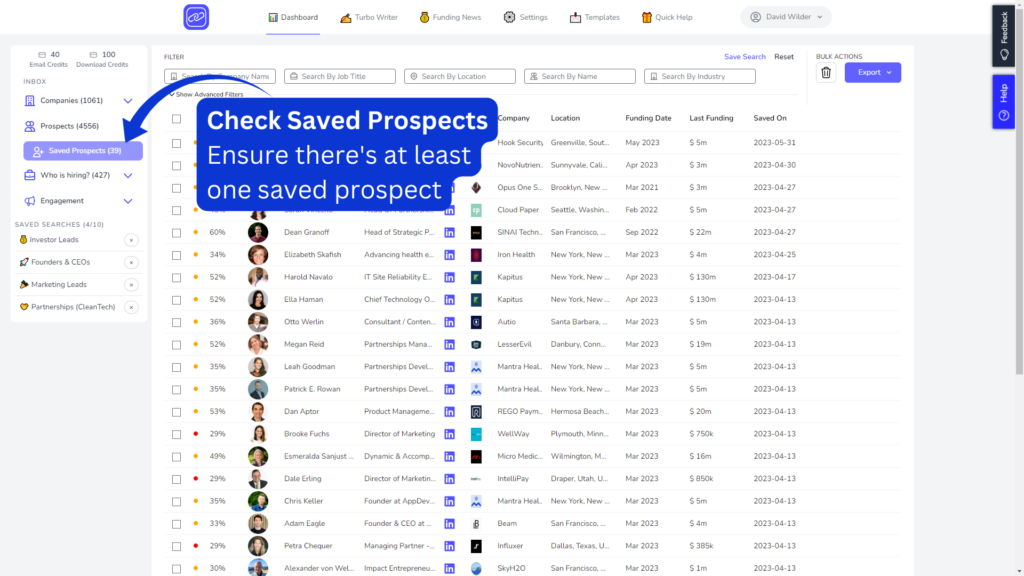
1.2 Confirm you have at least one “Saved Prospect”
Exporting leads into your HubSpot CRM requires you to have at least one “Saved Prospect”.
Here’s how to check (see image)
If you check and there are no Saved Prospects in your Prospects folder here’s what to do.
Add leads into your Saved Prospects folder by unlocking a Prospect’s email.
Follow these steps to unlock an email and save a lead into your Saved Prospects folder.
- Click on Prospects from the side menu.
- Choose a Prospect from the list.
- Click the Unlock Email icon on the top right corner.
- Check in Saved Prospects then proceed to the next step below.
2 Connecting Prelo to HubSpot & Test an Export
2.1 Navigate to the “Settings” top menu on Prelo
Follow the steps below to connect Prelo to HubSpot :
- From the dashboard click on “Settings” from the top menu
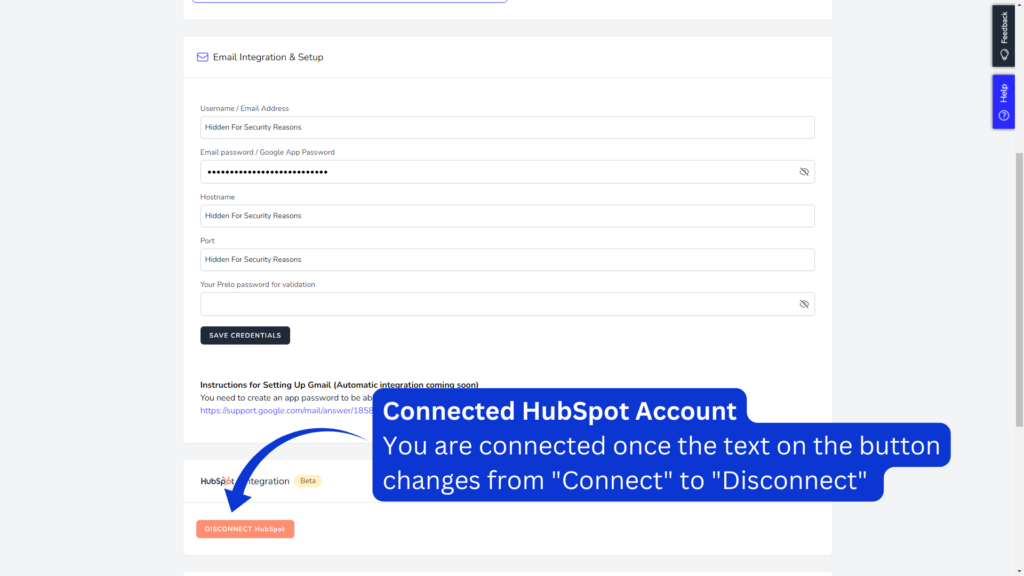
- Scroll down to the HubSpot Integration Section (see image below)
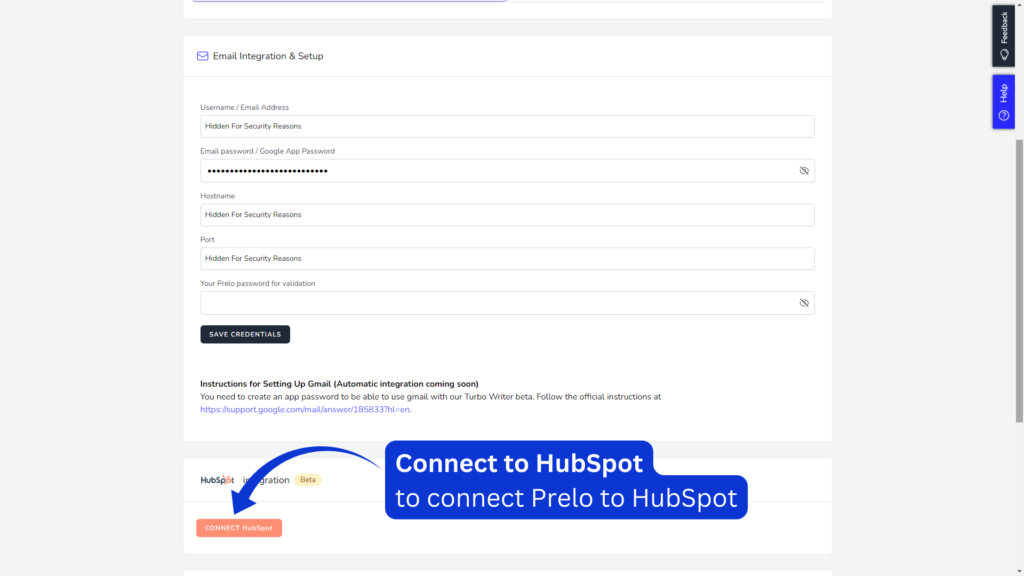
Prelo Settings Page Showing How to Connect to HubSpot
2.2 Click “Connect HubSpot” & Follow Instructions below
Now click connect HubSpot and follow the on-screen instructions :
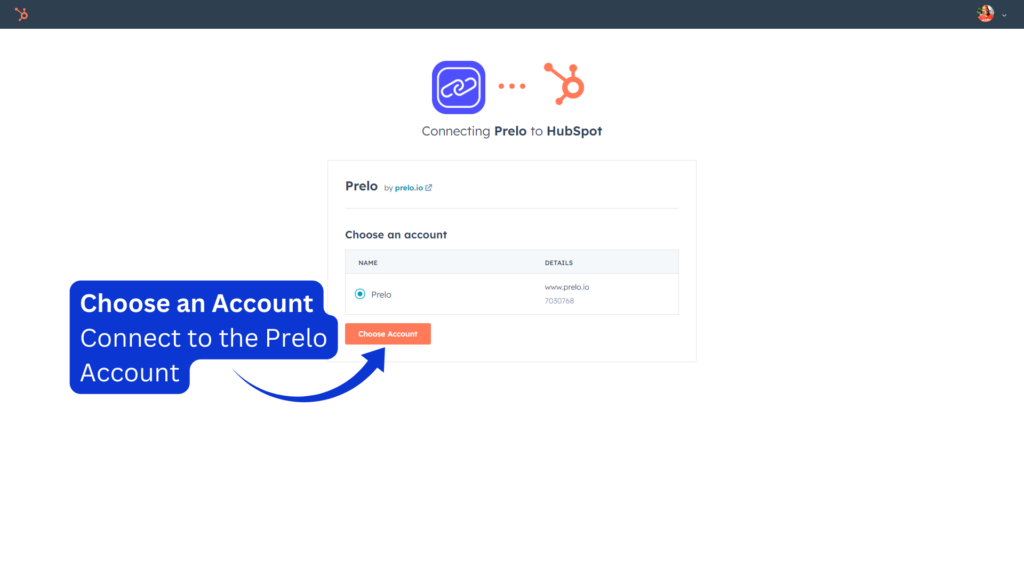
Once you are connected, you will notice that the HubSpot button on Prelo has now changed from “Connect HubSpot” to “Disconnect HubSpot”
It’s now time to test your HubSpot Integration!
2.3 Test Your Export to HubSpot from Saved Prospects on Prelo
Now that you are all connected to HubSpot, let’s test your first export from Prelo.
Follow the Steps Below or watch this interactive demo to get Started:
- Go to your Saved Prospects dashboard
- Click on the blue check box to select Prospects to export
- Click on the top right hand corner button labelled “Export” (see image)
- Click Export to HubSpot and wait for the export to start.
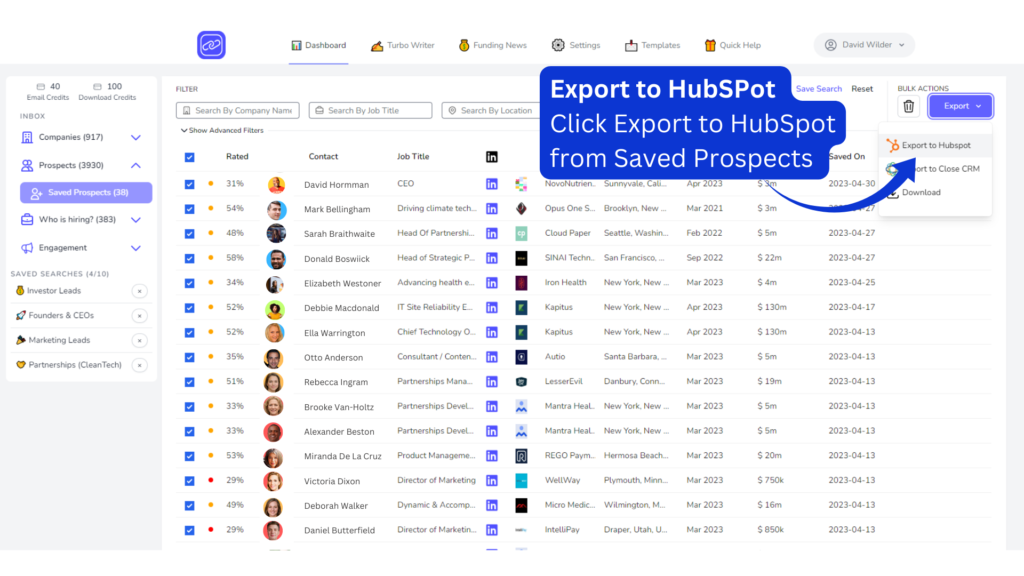
The Export Button Drop Down, Showing CRMs and CSV options to Export Prelo’s Data - Do not close the screen or leave the page until the export completes
- Go over to HubSpot to Check your records have been saved to HubSpot (see image below)
- Email Address
- Funding Date
- Funding Amount
- Company Location
- Lead Name
- Industry
- Company Size
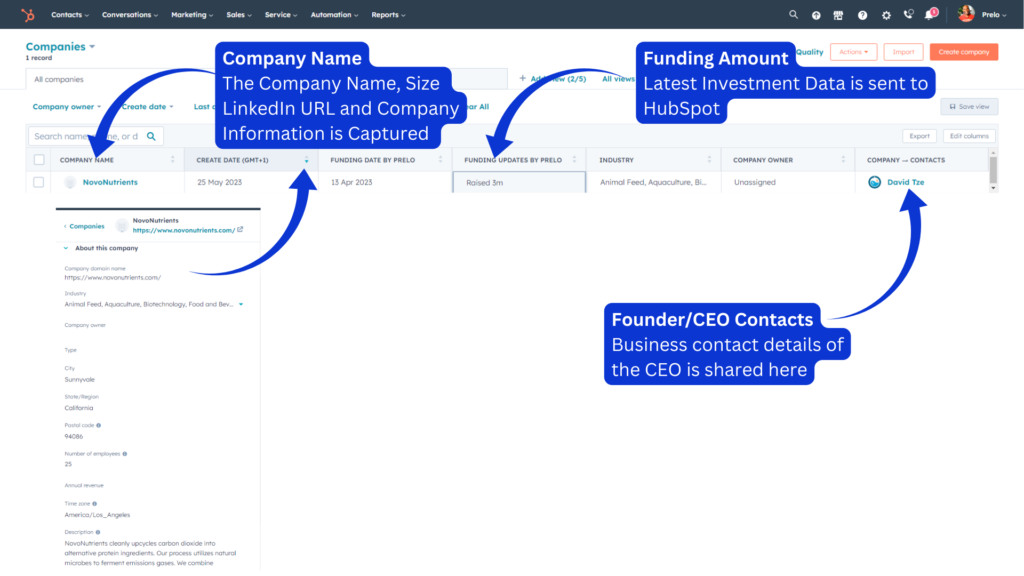
Above shows that a successful export to HubSpot was completed.
Was this helpful? Send an email to support